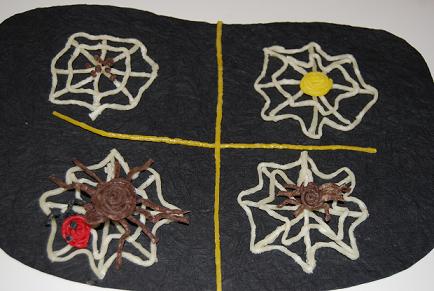
CREEPY CRAWLIES THEME for PLAYFUL PRESCHOOL – A Spider’s Life Cycle
This week the #Playfulpreschool blogging team is sharing activities centered around a CREEPY CRAWLIES THEME! Come learn about spiders and play with us as we sequence the spider’s life cycle and create a spider life cycle craft!
BOOKS ABOUT SPIDERS
Disclosure: This post and others within the blog contain affiliate links. For full disclosures, visit the ABOUT page.
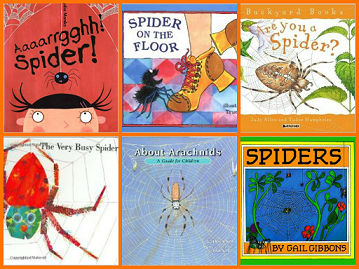
Many young children have seen spiders before (either outdoors or house spiders). The books below are fun books about spiders to explore with preschoolers!
Spiders by Gail Gibbons
The Very Busy Spider by Eric Carle
About Archnids – A Guide for Children by Cathryn Sill
Aaaarrgghh! Spider by Lidia Monks
Are You a Spider? (Backyard Books) by Judy Allen
Spider on the Floor (Songs to Read) by Raffi
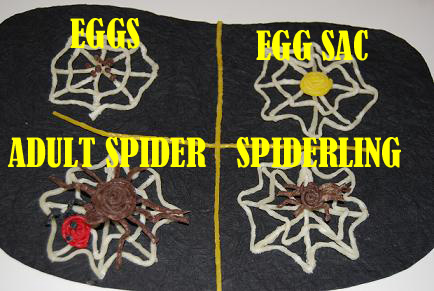
A SPIDER’S LIFE CYCLE
All living things have a life cycle that repeats itself – the same pattern goes on and on. Spiders are not insects as they have eight legs and not six like insects do. Spiders are a member of the arachnid family and further distinguished from insects as arachnids have no antennae or wings.
Basic Spider Life Cycle for Preschool:
- The spider life cycle begins with an egg. The female (mother) spider lays the EGGS.
- To keep the eggs safe, the mother spider spins silk around the eggs to create a SAFETY SAC.
- Baby spiders are called SPIDERLINGS.
- The baby spiderlings molt (spiders have their skeleton on the outside and shed it as they get bigger) until they grow to be an ADULT SPIDER.
Materials needed to create the Spider Life Cycle Craft: white/brown/yellow Wikki Stix, any color of mounting paper, and scissors. Note: laminate the mounting paper for durability or for use at a center with multiple children (clear contact paper will work if laminating supplies are not available). The Wikki Stix will lift off of the paper when the children are finished creating (for pretend play with the created webs and spiders).
Assemble all of the supplies on a table as an invitation for the children to create!
The children should divide their paper into four sections by placing one Wikki Stix vertically in the middle of the paper and another Wikki Stix (horizontally) across the middle.
To make the spider webs: The children can cut strands of white Wikki Stix in half and create a star pattern with the cut pieces on their mounting paper (make an X with the Wikki Stix and then add one strand horizontally across the center of the X and another strand vertically between the X). Invite the children to use additional white Wikki Stix around the ends of the “star” and to make the inner web. Each spider web the children make will be unique, just as real spider webs are designed differently!
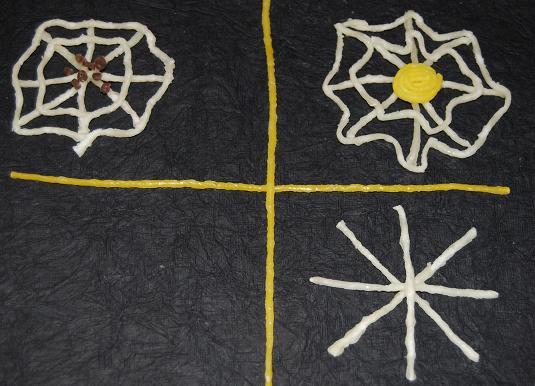
The spider’s life cycle begins in the upper left hand corner of the paper. After the children have designed their webs, brown Wikki Stix can be cut into tiny pieces to resemble the SPIDER EGGS.
The SPIDER’S EGG SAC can be created with a yellow Wikki Stix ball or spiral (wrap Wikki Stix around itself to make the spiral) and placed in the center of the web in the upper right hand corner of the paper.
Invite the children to create brown Wikki Stix SPIDERLINGS. There is no wrong or right way to create a spiderling – if desired, the children can use brown balls or spirals for the spider’s body and use cut pieces of Wikki Stix for the 8 legs. Using Wikki Stix is a great opportunity to enhance fine motor skills while the children learn and play! The spiderlings can then be place on a created web in the lower right hand section of the paper.
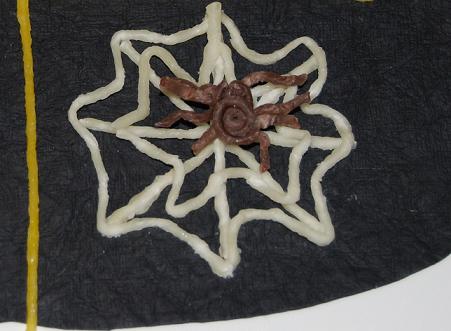 The ADULT SPIDER can then be created and placed in the lower left hand section of the paper. Our kids wanted to make beetles caught in the spider webs for their life cycle creations. What insect can your own kids create?
When the children are finished creating their life cycle, they can play with the Wikki Stix webs and spiders. It’s fun to watch preschoolers sequence the life cycle and tell stories of prey their spiders are feasting on!
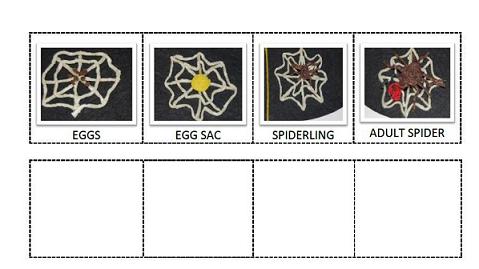
SPIDER LIFE CYCLE SEQUENCING CARDS – Spider Life Cycle Sequencing Cards
EXTENSION ACTIVITIES: Print the sequencing cards (linked above) and have the children cut out the picture cards. Invite the children to sequence the spider life cycle (working left to right) by placing the picture cards into the blank boxes.
For a matching activity, print two copies of the picture cards and place them face down on a table or the floor. Have a child turn over two cards at a time to see if the pictures match. If the cards form a matching pair, the child keeps the cards. If they do not form a match, the cards are turned face down again and play continues until all matches are found.

MORE Creepy Crawly Activities for Preschoolers #PlayfulPreschool
Beginning Sounds: Hunting for Creepy Crawlies by Mom Inspired Life
Preschool Songs: I’m a Hungry Spider by Growing Book by Book
The Creepy Crawlies Kingdom by Learning 2 Walk
Number Word Spider by Tiny Tots Adventures
Creepy Crawly Slime Recipe for Kids by Fun-A-Day!
Spider Web Construction – An Engineering Activity by Rainy Day Mumm
Insects and Spiders-Counting and Math Song by Capri + 3
Creepy Crawly Gifts Kids Can Make by The Educators’ Spin On It
Learning About Composting Worms by Raising Lifelong Learners
Making Creepy Crawly Crafts with Leaves by Life Over C’s