 Painted Cardboard Tube Heart Numbers
Materials needed: Cardboard tubes (one tube for each student), clothespins, tempera paint, paint smocks or t-shirts to protect clothing, scissors, paintbrushes and trays, construction paper, markers, tape or poster putty, and counters (we used Valentine’s M & M’s in the picture.)
Have the children paint the cardboard tubes with any color desired (our children held the tubes with clothespins as it was easier to turn the tubes to paint all sides.) Use the clothespins to hang the tubes until completely dry. When the tubes are dry, flatten the tubes and have the children cut (assist younger children) 1/2 inch sections across the flattened tube (1/2 in. is approximate as it really doesn’t matter how wide or narrow the children cut the tubes.) When finished, the children should each have several “oval” shaped rings from each of the cardboard tubes. Slightly indent one end of the oval until it appears to be heart-shaped. We did the cardboard hearts as an art activity on Day 1 of our Valentine’s theme activities.
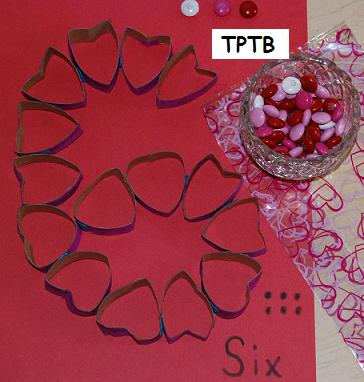
On Day 2, we used the hearts as a small group math activity: divide the children into small groups and distribute the painted cardboard tube hearts evenly. Ask each of the groups to work together to create any number or numbers that they desire using the cardboard hearts. Some of our groups chose to use poster putty and some of them used tape (the tape worked better as the poster putty came loose when the children worked together to form their numbers.)
Have the children place their cardboard tube numbers on pieces of construction paper. Older children can write the number words while the younger children can make dots that correspond to the number they made. Have the groups use counters or small Valentine’s items/stickers for basic counting (have the younger children verbally count as they place the items/counters or stickers on the paper.) The older children can make teen numbers or larger numbers from their cardboard tube hearts.
Valentine’s Heart and Non-Standard Measurement
Heart for Non-standard Measurement
Heart Graphing Table
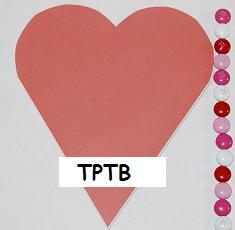
 Print the Heart for Non-standard Measurement (one for a large group activity or several if doing in small groups) and one Heart Graphing Table (both linked above) for each student. Decide what “non-standard” measuring items you would like to use (ex: M & M’s, O’s cereal, foam blocks, unifix cubes, paper clips, wood blocks, game counters, etc.) Print the heart template and have the children predict how many cubes (or other measuring items) it will take to measure the heart (see photo at the beginning of this post.) Talk about good guesses as estimation is a difficult concept for younger children to grasp. Some children like to consistently say, “100!” Discuss whether 100 would be a good guess or not by measuring some other things. See how many cubes it takes to “measure” the hand of a child. Is the heart bigger than a child’s hand? See what other things around your room you could “measure” for perspective. Chart each of the student’s predictions on a separate sheet of paper. Ask each child to put one M & M at the bottom of the picture until you have enough to “measure” the heart. Count together how many M & M’s it took and graph the correct number on the Heart Graphing Table.pdf. (linked above). Extension idea: “Measure” other objects around the room and graph how many cubes, candies, blocks, etc. were used.
 Candy Science Experiment
Dissolving Dyes – Candy Science Experiment
Materials needed: Skittles or M & M candies (we used the Valentine M & M’s in the photo above), small cups, white paper (one piece for each child), Candy Science Experiment Recording Sheet (linked above – one for each child), and water.
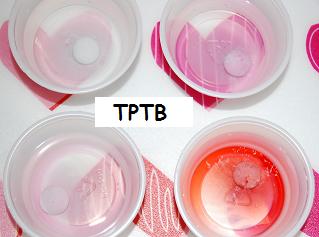
Ask the children to quickly place 4 candies on a dry sheet of white paper. Have the children carefully lift up the candies to see if the color came off on the paper (note – if the children hold the candies for awhile in their hands, the moisture from their hands will make the dyes dissolve and bleed a little onto the paper.) Explain to the children that the candies need moisture to help the colors disperse. Have the children then place 4 candies into small cups of warm water. Let the children observe the cups and how the colors dissolve in the water. Discuss and record answers to the questions on the recording sheet with your children.
For more Valentine’s Math or Science Activities, please visit the Valentine’s Thematic Unit at The Preschool Toolbox Blog!