Literacy – Snowman -AT Word Families – Snowman Word Families
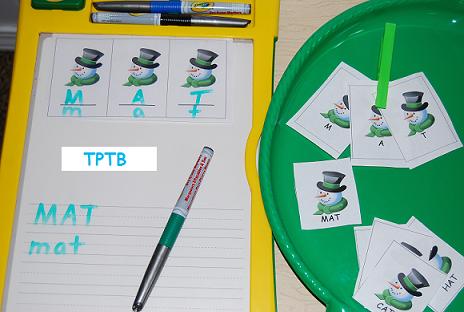
 Materials needed: One Snowman Word Families.pdf per student (linked above), 1 basket/tray labeled with the –AT snowman from page 8 of the word families file, scissors, clothespins labeled with the individual letters to each of the 6 –AT words on the cards, and dry erase markers.
Print the snowman cards on heavy paper and laminate for durability, if desired. Have the children cut out the word and letter cards. Label one basket with the –AT snowman from page 8 of the file. Place all the individually lettered clothespins in the basket. Have the children work to clip the appropriate individual letters to each of the word cards. When the children have finished clipping the clothespin letters to the word cards, they can use dry erase markers to copy the letters clipped to the blank lines on the snowmen on pages 5-8.
The children can also turn the letter cards face down and work to find the matching letters to their word family cards. When all the letters that make up the word have been found, clip that word together with one clothespin.
Extension idea for younger children: Students can clip only the beginning letter of each word card. They can use the blank snowmen on pages 5-8 and stamp or write the beginning letters to each of the word cards. The blank snowmen could also be used for different word families: -OP, -IT, -AN, -AR, etc.
Extension idea: Have the children place all the beginning letter snowmen cards face down on a table. Have the children turn over the card, say the letter sound, and clip to the A and T letter cards to form the word. As the children begin to recognize the rhyme of the words and the change in the beginning letter sounds, reading the word will become less difficult.
We use the Crayola Dry Erase Activity Centers with the kids at home as they help us save on laminating costs and are durable!
Math – Snowball Patterning – Blank Pattern Strips
Materials needed: Blank pattern Strips.pdf for each student, marshmallows or white pompoms (snowballs), seasonal winter stickers.
Print the blank pattern strips and have the children use the pompoms, marshmallows, and stickers to create different patterns. For younger children: Make a pattern on one of the strips and see if they can copy the pattern onto the second strip. Older children can make their own patterns with the “snowballs” and stickers.
Science – Properties of SNOW – Melting Snowballs
Materials needed: 3 containers, snow or shaved ice, Melting Snowballs.pdf (linked above) recording sheet, pencil, scissors, crayons/markers, and poster putty or tape.
Make 3 snowballs (as close to the same size as possible) and place them in containers in different areas of the room (ex: close to the heater, near a window, on the counter, etc.). If you live in an area that does not have snow, shaved ice (or even an ice cube) can be substituted. Observe and record which snowball melts first, second, or third on the recording sheet. Cut out the clock circle and arrows from the worksheet (assist younger children or pre-cut for them.) Use crayons, stamps, or markers to make the numbers on the circle for the time the 1st snowball melted. Stick the arrows on the clock with poster putty or tape.
Young children may not have the ability to grasp the actual concept of TIME, but when they watch the hands move on a clock at home (or the change in digital numbers), children become aware of the passing of TIME.
 ART – Cardboard Tube Snowman – Snowman Features 1
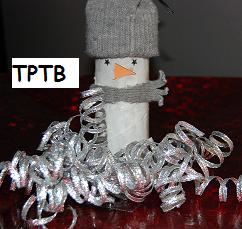
Materials needed: One empty cardboard tube for each child, white paint, paintbrushes (we used sponges), hole punch, scissors, snowman features template linked above, smocks or old t-shirts to protect clothing, and fabric scraps.
Ask the children to paint the cardboard tube white with a small sponge or large paintbrush. Using fabric or paper scraps, let the children add a hat and a scarf (the paint will act like “glue” so none is needed unless the cardboard tubes have dried.) Print the snowman features (linked above) and have the children punch out eyes from the black dots (assist younger children with the hole punch.) If the children want, they can punch more black dots for the mouth of the snowman. The children can cut the nose from the template and even the hat, if desired.
Extension: With a few modifications, the children can make penguins from the cardboard tubes/template for use with a penguin or winter unit.
Large Motor/Large Group Activities – Color Match Snowball Toss
Crumble white grocery bags (be cautious when using plastic bags around young children as they pose a suffocation hazard – *SUPERVISE CHILDREN WELL) into balls and secure with clear tape. Add a colored dot to each snowball. Label laundry baskets or large bins with color words. Line the baskets up on one side of the carpet and have students stand on the other. Students then throw the snowballs into the correct baskets.
For more snowman, snowball, and snow activities, please see the Winter Theme here on the blog!