Children love to learn about life cycles and how things grow. Making an apple tree life cycle to introduce the children to how apples are grown is a wonderful way to incorporate science lessons into your Fall Themes.

APPLE TREE LIFE CYCLE – Apple Tree Life Cycle Sequencing Cards and Apple Tree Sequencing Blank Mat
Materials needed: 1 Apple Tree Life Cycle Sequencing Cards (file linked above) per child, glue sticks, and scissors.
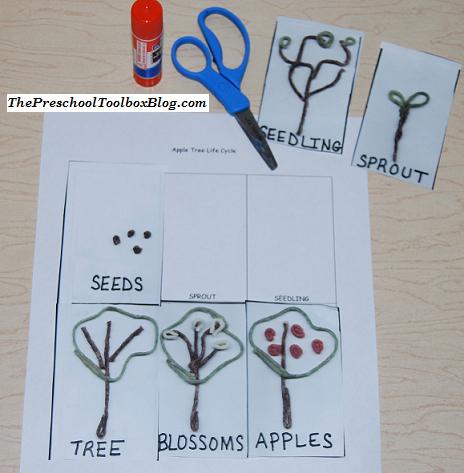
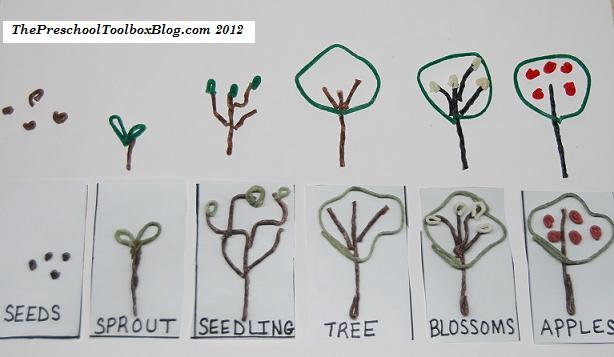
Print 1 copy of the picture file for each of the children. Laminate the cards for durability and cut apart. Explain and discuss with the children the process of growth from seeds to a tree that bears fruit. Give the sequencing cards to the children to practice putting in sequential order.
Extension for younger children: Print one set of cards and place in sequential order. Have the children place their own cards in order by copying the example or placing their cards on top of the ones already in the proper sequence.
Extension Activity #1: Print a copy of the Apple Tree Sequencing Blank Mat (linked above). Have the children draw their own pictures for each of the sequencing cards. The children can also cut the pictures cards apart and glue the cards in the corresponding areas on the blank mat. TIP: Laminate the blank mats for the children to use dry erase markers or crayons to draw with. The laminated life cycle mats can then be used throughout your Apple or Fall Lessons.

Extension Activity #2: Let the children use Wikki Stix® to make each of the Life Cycle Cards. Younger children can copy the patterns. Older children can try to create on their own versions of: seeds, sprout, seedling, tree, blossoms, and the fruit of the apple tree.
Our children love this activity and learning/using/eating APPLES! For more ideas and free activities, view the Apples Category (click to view the drop down categories) to the right side of this blog or find other activities here.